Camera Review: Brinno TLC-200 Pro
Is the Brinno a good solution for Dashcam time-lapse videos? Let’s put it to the test.
What is it?
Brinno makes several time-lapse cameras. The most common current models are the TLC-200 and TLC-200 Pro. The big difference between the two is, the Pro version offers interchangable lenses (and because of this feature, the lens protrudes slightly more). The Pro version also captures 3-5 images per second in ASAP mode (more on that in a moment), while the regular version promises 2 frames per second.


I received the TLC-200 Pro — and I think it’s the better choice for drivelapse video. You don’t want your video to go too fast, and the ability to shoot 3 to 5 frames per second is a big benefit.
Both cameras have lenses that can tilt up and down (but not left to right). They both take 4 AA batteries, and they’ll run for a surprisingly long time before you need to change them.
The camera includes a standard screw-mount on the bottom, making it compatible with just about every tripod and other mounting device out there.
How did MyDrivelapse end up with it?
In the interest of full disclosure, it’s important to note, before we go any further, that I didn’t pay for this camera. A Brinno representative contacted me to discuss the camera as a possible solution for Drivelapse. He sent me a camera and asked me to experiment with it.
Did getting a camera for free sway my opinions? Maybe a little. But everything that follows is an honest account of how I implemented the camera as a dash-cam. I’ll tell you what worked and what didn’t, as well as what I liked and didn’t like about the camera, and I’ll offer some suggestions to Brinno for future improvements (if they’re interested). And it’s also worth mentioning, that after experimenting with the free camera for a few weeks, I purchased a second one.
What kind of video does it shoot?
I typically use a “real” video camera, which shoots 30 frames per second. I usually fill a 32-gig memory chip every day while on vacation. Then, when I come home, I speed-up the videos during editing. The result is a very smooth video with the flexibility to go fast or slow.
The Brinno is not a conventional video camera. It’s made specifically for shooting time-lapse videos. It’s marketed, in part, as a solution for people who want to shoot long-term construction projects (for example, constructing a building over the course of several months). Its features are designed with this purpose in mind. You can tell the camera to shoot one frame per second, or one frame every two seconds, or five, or ten, or once a minute, and so on. You can set a timer, so that the camera only shoots during daytime, when work is being performed. Then, you leave it alone. Change the batteries and the memory card from time to time, and it will deliver months of video, compressed into a few minutes.
As I mentioned earlier, I’ve been setting the camera on ASAP. This setting tells the camera to shoot the next frame, as soon as possible, after shooting the previous frame. The camera’s processor is fast enough to handle 3-5 frames per second in daylight conditions. At night, it will be fewer, because the exposure of each frame will be longer.
Even at five frames per second, versus 30 on a conventional camera, you’ve got a 600% increase in speed — and that might be too fast for your taste. You can choose 15fps playback, instead of 30, which slows it down to about 300% faster than reality, but the video doesn’t look as smooth. Is that good or bad? More on that in a moment.
Mounting Options
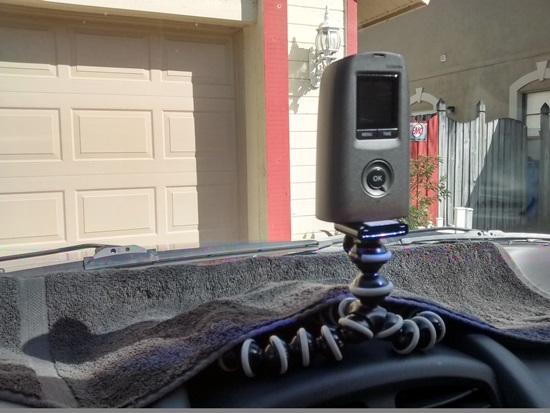
I’ve been experimenting with a number of mounting options. Each one has benefits, and some awkwardness. Since my adventures on camera mount engineering have turned out to be quite extensive, I’m going to tell those tales on a separate page. But I will show you a couple of examples here:


Inside the windshield: this is how I’ve always mounted my dashcams. With the Brinno, though, the lens captures a wider image than my old video cameras. As a result, you can see the hood of my car, along with some reflections from my dashboard.


Roof mounted: after I tried several shots, I realized that I really like this view. Mounting a camera on the exterior of the car, on the roof or anywhere else, is tricky. But, this shot puts the horizon closer to the center of the frame, which reduces distortions and, I think, makes the image much more pleasing. It also allows you to include the hood of the car, which adds the perspective of a non-moving element in the video.

After some experimentation, I committed to the roof-mount idea, and built some weatherproof cases (out of food storage containers and SLR camera UV filters), mounted them with powerful magnets, and secured them with cables and locks. I purchased a second camera, to allow forward and rear-view shooting at the same time. I’ll explain much more on the How to Drivelapse page.
Day, Night, and Rain
I’ve done a few tests in daylight, with very good results. I did discover that using the auto white-balance setting resulted in frequent color temperature changes as the video played. These were distracting, but they are easily avoidable. I switched the camera to the daylight setting, and the video became more consistent. However, the camera will re-evaluate the white balance every time it creates a new file, which can create some jumps in color temperature.
On my first day out with the camera, I drove through a rainstorm around sunset, and then continued on through twilight. The camera performed much better than my old video cameras in the low-light conditions. With the old cameras, once the sun was down, I was done shooting video for the day. With the Brinno, I’m getting much better performance at twilight, and even in complete darkness, so long as there are some street lights and illuminated signs around.
What about heat?
In my early tests, I left the camera running in my windshield, on a hot, sunny Florida day, for about 9 hours, capturing a full day of clouds rolling by. The camera was hanging from a strong suction-cup with a camera mount, up-side-down on the window. About an hour into the video, the suction cup began to melt, and the camera slowly dropped.
While the suction cup didn’t survive, the camera functioned flawlessly. I don’t know how hot it was inside the car — easily 130 degrees or more, I’d guess. The heat didn’t affect camera performance, at all.
Since then, I’ve run the camera several more times, in day-long tests in direct sunlight. Heat has not seemed to affect the camera in any way.
The Good
Excellent image quality: As I mentioned, image quality is much better than what I’d been capturing with a video camera — even though both are shooting at 720p. I suspect it’s because the Brinno has a better, bigger sensor. Also, the Brinno is taking individual images and assembling them into a movie, giving each frame a higher quality.


Surprisingly good image quality in low light
Simple: If you don’t want to capture hundreds of gigabytes of video on a vacation, or spend hours editing it all down, the Brinno provides a good solution. You may still need to do some post-production to tweak the final product, but generally you’ll get good results if you start the camera and let it run.
Long Battery Life gives you more options: A roof mount, or rear-view mount, was never an option for me, because of powering issues. A Go-pro or other cameras will only last a couple of hours between charges. The Brinno will run for a full day, or even several days, depending on the image frequency. Start it running in the morning, stop it when you’re done for the day, charge the batteries, and do it all again the next day.
Do other things with it, too: The “pro” version of the TLC-200 is also useful for time-lapse videos of sunsets and stars. The interchangable lenses give you some professional options (although they are not cheap). When you start thinking of things to time-lapse, you’ll come up with a million ideas. I shot myself mowing the grass recently. It’s highly entertaining.
The Bad and the Different
External Power: You can run the Brinno off a car charger, using the USB port. It accepts external power, which is great. There’s just one problem. If that power disconnects, then reconnects (let’s say the cord gets pulled out of the cigarette lighter, then you stick it back in), the recording will stop. And that’s really bad, because you simply can’t trust any external power supply to work 100% of the time. If I did use external power, the camera would almost definitely stop recording at some point, without me noticing. The good news is, battery life is so good, you don’t necessarily need to use external power. –UPDATE– The experts at Brinno tell me that there is a firmware update that fixes this problem, and allows external power to connect and disconnect without halting the recording. You may need to contact them to request this update.
Too Wide: When I place the camera on my dashboard, I see a lot of the dashboard in the shot. And since my car is 13 years old, and the dashboard has baked in Florida heat for all those years, it’s not pretty. I could eliminate some of the reflections with a larger black towel — but then I have a bath towel stretched across my dashboard. Another solution: try one of the expensive “pro” lenses that’s less wide-angled.
Can’t tell if it’s recording: Once you’ve started recording, the screen goes blank. That’s a good feature for saving battery power. But, it makes me worry that the camera isn’t recording. Brinno expert Josh Banks explains in this post that you can push the OK button to confirm whether the camera is recording. If the camera is recording, the LED will illuminate. Be aware, though, the green LED can be difficult to see in direct sunlight.
Grainy, small screen: The video screen on the back of the TLC-200 Pro is very small, and very grainy. I appreciate that this is a cost-saving and battery-saving feature. But, it also makes it tough to see what kind of shot you’ve lined up. There is a solution, though. You can connect the camera to some Android cell phones via the USB port, and see the camera image on your phone’s screen. You’ll need the Brinno ABR-100 card reader, and a phone that’s USB OTG compatible. You can also connect it to a laptop and use it as a webcam, which allows you to preview the image on a large screen.
Quirky navigation of setup menus: It takes some time to figure out which buttons to push, to navigate through the setup menus. While this could be fixed with a better design, it’s only a minor annoyance. Once you’ve set up the camera, you’ll rarely need to muddle through the confusing menus.
Video is jerky, not smooth at 15fps playback: This was my biggest concern with the Brinno’s video in the beginning. If you shoot in ASAP mode and play the resulting video at 30 frames per second, it’s like watching the video at 6- or 7-times normal speed. That’s at the upper edge of what I find acceptable for a drivelapse video. You can slow it down by playing the video at 15 frames per second, but that gives you a less smooth, somewhat jerky playback (sort of like watching stop-motion animation). I didn’t like that feeling at first, but it’s growing on me. I’m still trying to decide how I feel about it — but I don’t dislike it.
Files too big? On my first big road test of the Brinno TLC-200 Pro, I ran into an unexpected problem. At the end of the day, when it was time to dump data from the memory card onto my computer, I was seeing an error message, making me think that my SD card was corrupted. It turns out, there was a fix: I needed to right-click on the drive, select Properties > Tools > Error Checking. This “fixed” the problem and allowed the file to be copied, but the file still behaved oddly once it was on my hard drive (it would sometimes cause file explorer to crash). This only happened on the very largest files, above 4,194,304 kilobytes. The files weren’t corrupted, and I was still able to edit the videos, but the files were more difficult to handle. I think a firmware update to the camera could fix this problem by giving files a slightly smaller maximum size. Also worth noting: it’s rare to get a file size this big — it only happens when you let the camera roll all day, and split the video into separate files.
A Few Frames Lost: When you let the camera run all day, and it splits files automatically, you’ll lose a few frames in between files. Occasionally it will be very noticeable, if you’re at a critical spot in your video, but most of the time it’s just a small jump. It’s not a big flaw, but it would be nice if the switch between files was seamless. The camera also resets the white balance when it makes a new file — this can be bad if, for example, you’re in the middle of a tunnel when it happens (which actually has happened to me).
Summary
As I mentioned earlier, my first Brinno camera was sent to me, for free, for testing in a Drivelapse application. Clearly, I like it, because I’ve purchased a second one. I’m still not ready to make it my only camera on an extensive road trip, but I am excited about the possibility of adding a new angle (rooftop-mounted) and a new shot (rear-view). I like that the video is ready-to-go out of the camera, and I’m constantly stunned by the quality of low-light scenes. I’m also having fun with the camera in non-Drivelapse applications.
The price of the camera isn’t exceptionally expensive, but I’m notoriously thrifty, so the $200 (+/-) price tag makes this a serious purchase for me. You could buy a mid-range action camera for the same amount of money, but you wouldn’t get the same battery life, and you’d need to speed up the video after shooting. And, you’d generate many more gigabytes of data than the casual Drivelapse’er needs.
My conclusion is, the Brinno TLC-200 Pro is a good choice for recording a road trip. Buy it several weeks before you leave, if possible, and experiment with it. Make sure you’re happy with how you’ve mounted it, the shot you’re getting, etc., and be sure you have a good strategy for battery recharging and data management. With a little prep work, I think you’ll be very happy with the results you get!


